Setting up Kohler illumination on an iScope.
Microscopes with a field iris diaphragm on the light source can achieve Kohler lighting. The combination of field and condenser iris enables the creation of parallel light rays passing through the specimen and therefore providing an even field of illumination and good contrast.
Firstly – set the height of the condenser (you only need to do this once).
1) Focus on an easily seen specimen slide with the x10 objective.
2) Close both the field and condenser iris to their maximum (a small circle of light will still be visible).
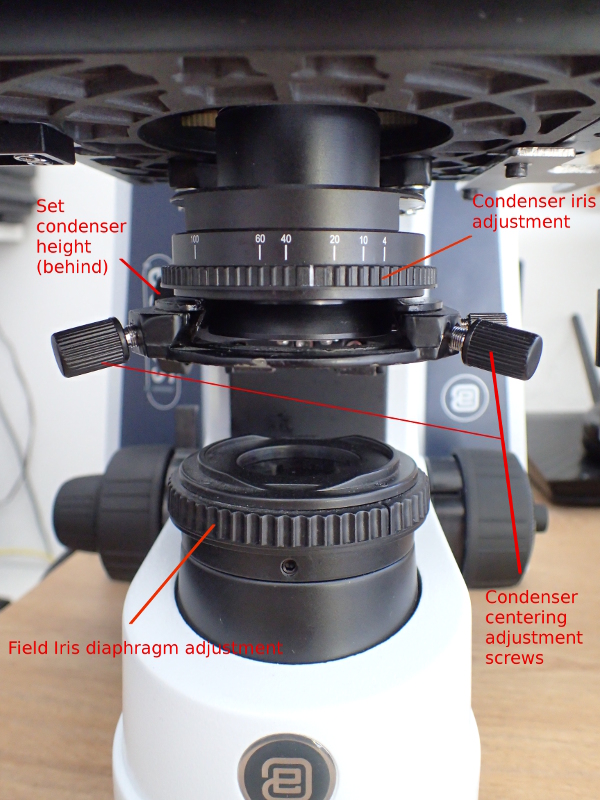
3) Using the condenser height control (situated under stage, left hand side) move the condenser up (or down) until the sharpest image possible of the closed field iris is achieved.
4) Using the condenser centering adjustment screws , centre the image of the closed condenser in the field of view. (Usually this has already been done.)
Condenser height is now set. Now as you move between objectives you will only need to adjust the field iris and condenser iris.
5) Select your objective. Open the field iris until it just disappears outside of the field of view (Fine adjust its centred position if necessary).
6) Move the condenser iris to the position which matches the objective (it is labelled 4, 10 , 20, 40, 60 and 100). If you prefer more contrast, the condenser iris can be adjusted to 70-80% of the recommended position.
7) Adjust the brightness of the image using the lamp control.
8) Enjoy a nice image 🙂
Many thanks to Rob for suggestions and feedback on this page.